
1/72nd Scale Model Spitfire Mk 1a.
For my second model, I decided to make a 1/72 scale Spitfire Mk 1a and had an example of an Airfix kit in my stash. There are only 36 parts in this kit, and it’s not a complicated build. I know that it is another Spitfire, but I wanted to try 1/72 scale, and I already had this kit.
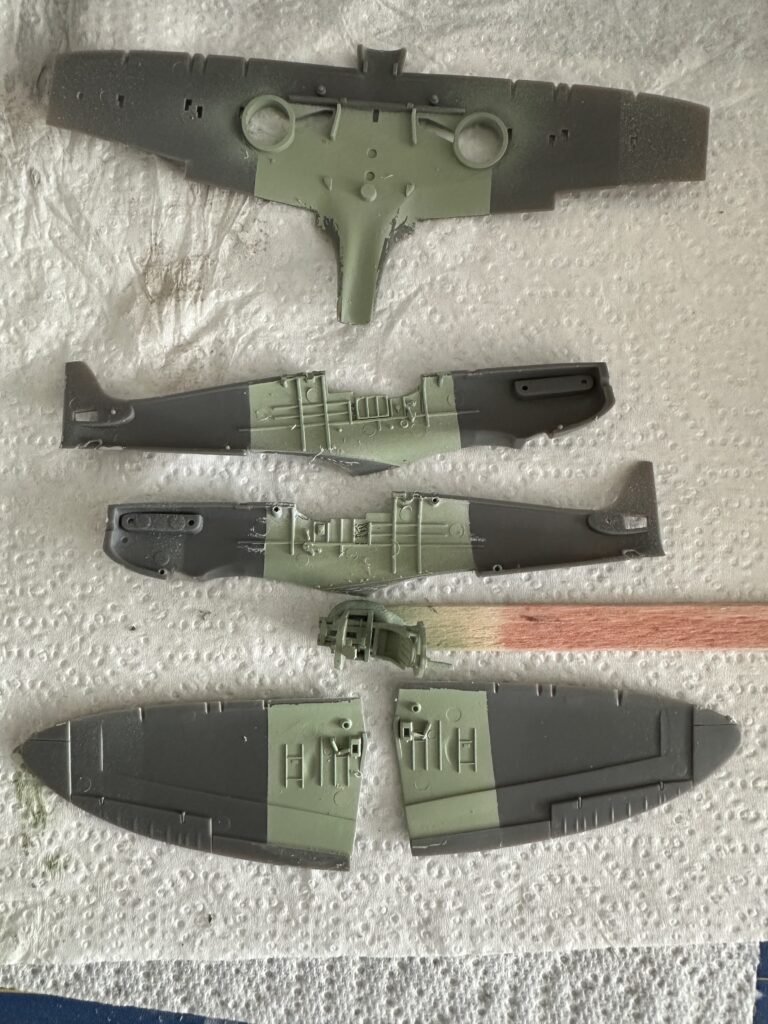
The interior was painted in RAF interior green.
The normal way is to start with the cockpit and the painting of the interior and fuselage. And although not necessary, I masked these areas off, as you can tell by the straight lines of paint.
Making it look used.
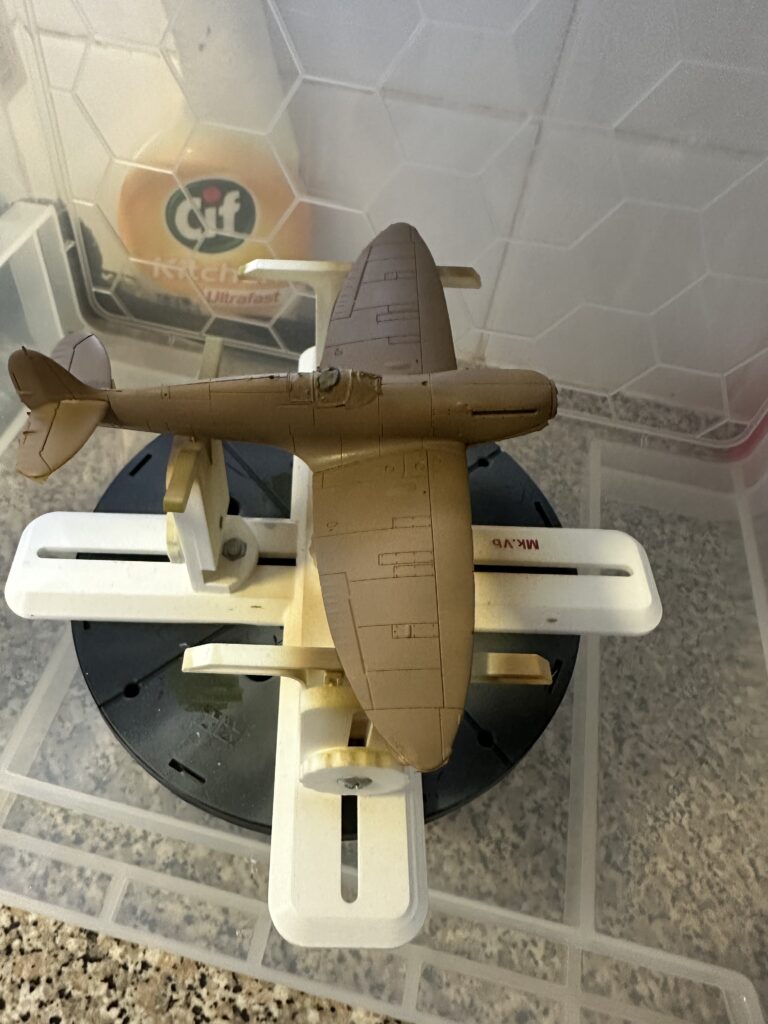
I decided to have a turn at applying a wash to the interior just to see how it would turn out. I had at the time only one colour of wash, and that was Vallejo Wash FX Dark Grey. This was thinned with water and as you can see in the below image was not too bad.
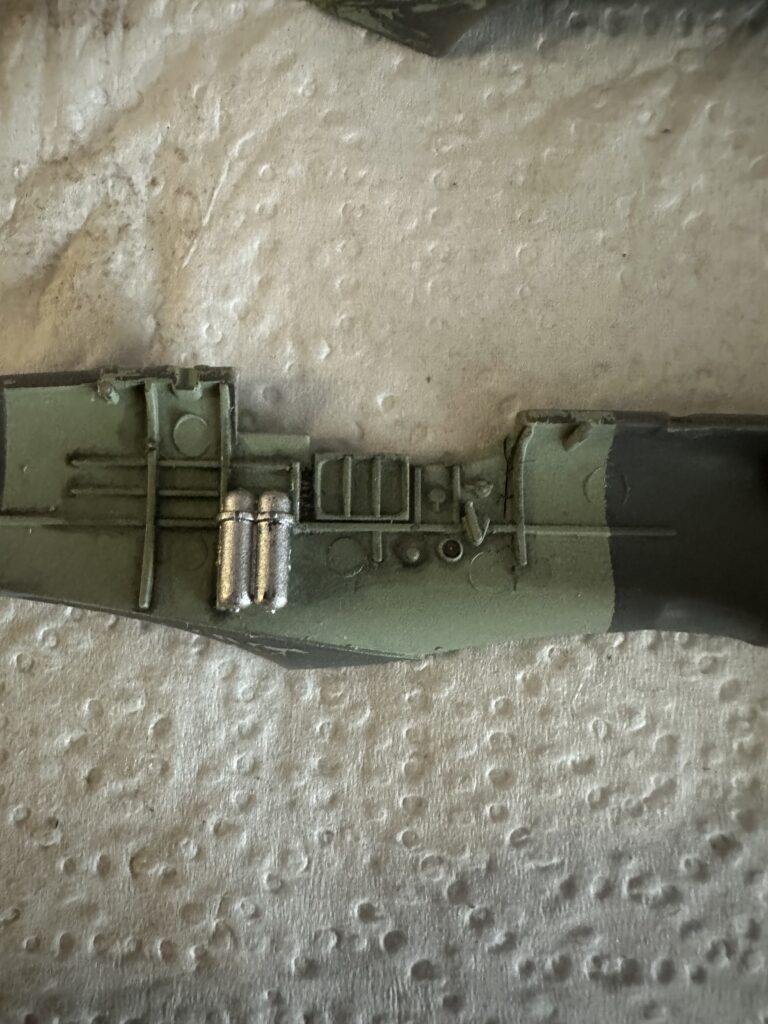
A Dark Grey Wash was applied to the interior.
After painting the interior, the cockpit parts were assembled, and the fuselage halves were cemented together before adding the wings.
The cockpit canopy was masked off and then glued onto the model, ready for painting. Then it was time to prime, and I used Vallejo Grey primer again.
This primer goes on well and looks great when dry, but I have found that it scratches and marks easily.
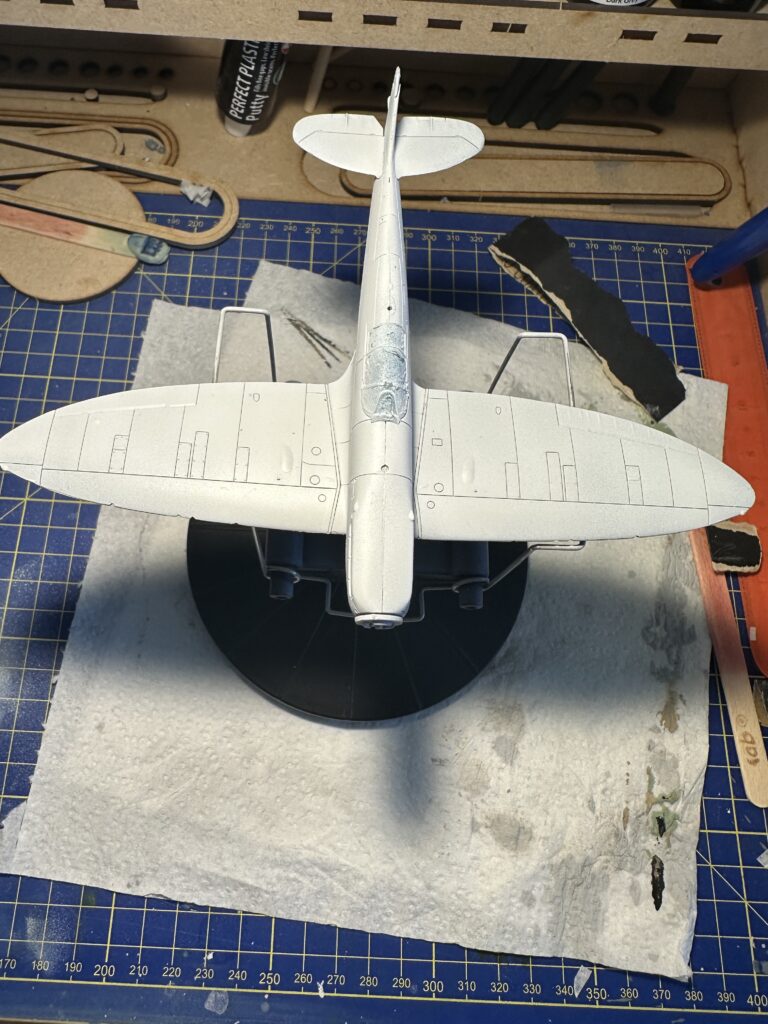
Vallejo Grey Primer looks great, but scratches easily.
Painting the Exterior.
At the time I was building this kit, I followed instructions from Richard’s Modelling Adventures. He was making this same model, demonstrating how to mask and paint a model, and I learned a lot from this YouTube channel.
The underside was then painted with Vallejo Duck Egg Green, and the trick here is not to mask any part of the model but to spray paint on the sides higher than necessary, then you only need to mask the bottom surface once the paint has dried.
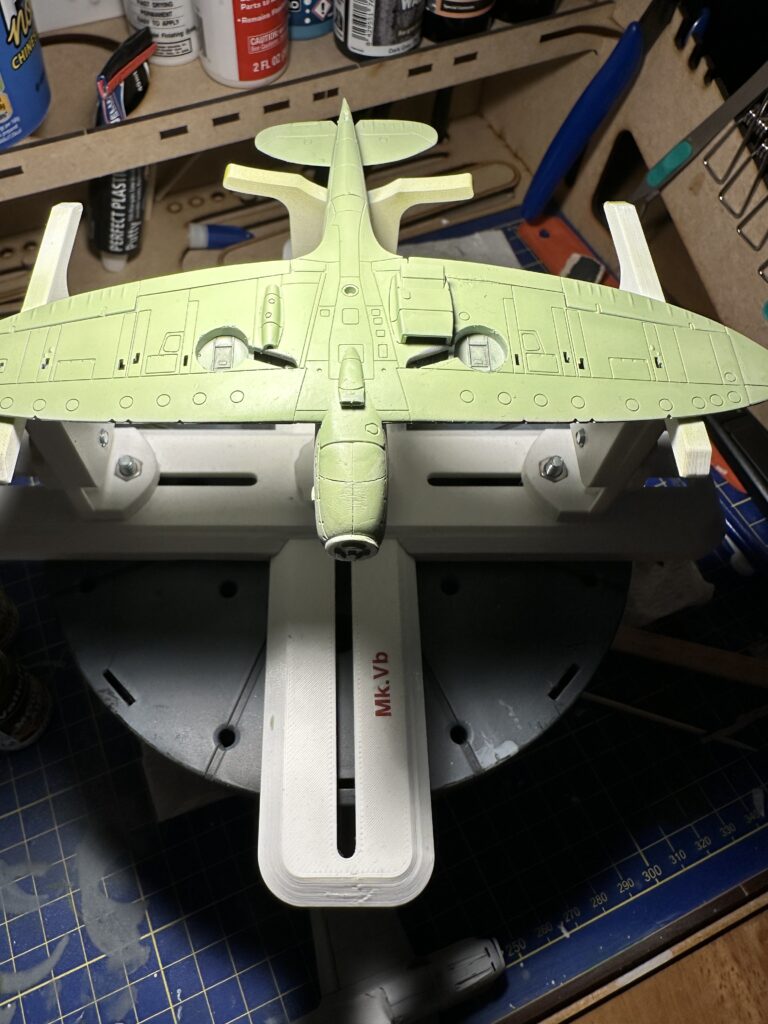
The painted underside of the Spitfire.
The underside of the model was masked with Tamiya masking tape. I followed the edges with thin strips of masking tape so that there was a straight edge where the different colours meet. And then the rest of the underside of the model was filled in. Basically, you want to cover all of the areas of the model with masking tape that you don’t want painted.
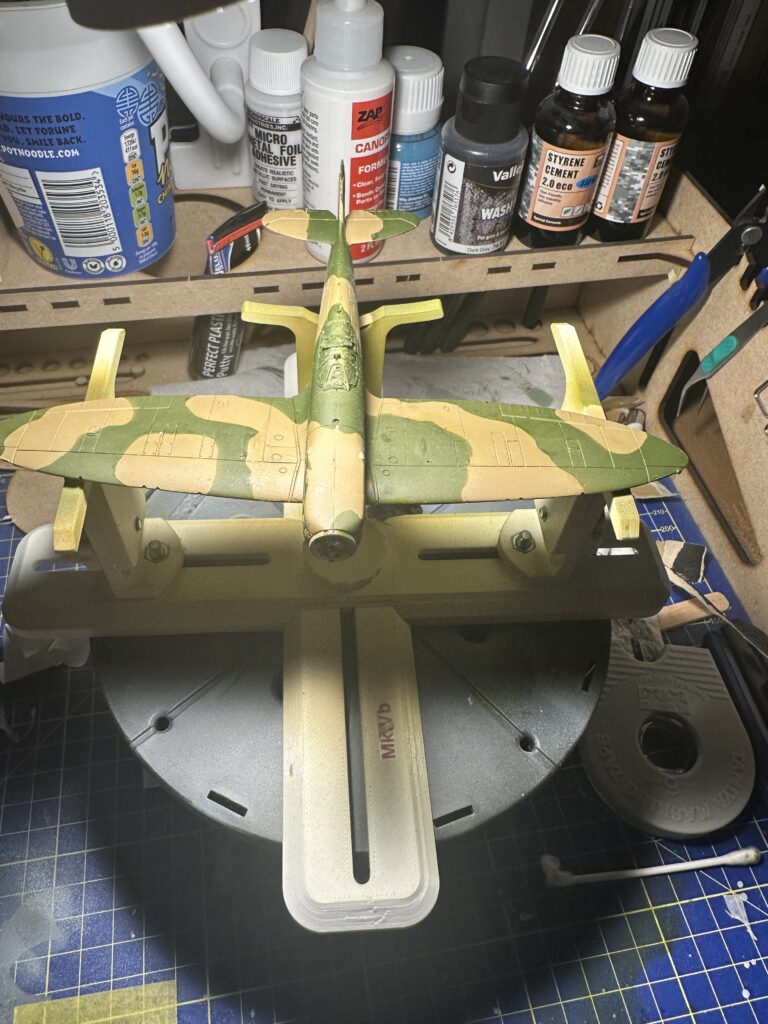
The upper surface is painted in Dark Earth
Masking The Model.
After masking the lower surface, the upper surface of the model was painted with Vallejo Dark Earth 71.323, a nice brown colour. After leaving it for a couple of days to dry the top was masked with masking putty and was then painted with Vallejo Dark Green as seen in the image below.
Applying the Decals.
A gloss coat was then applied to the model and left to dry, as the next stage would be to apply the decals. Putting decals on a model looks easy but this took me hours to do, I think that I spent around six hours over three days doing the decals, but it is rather satisfying and well worth the effort.
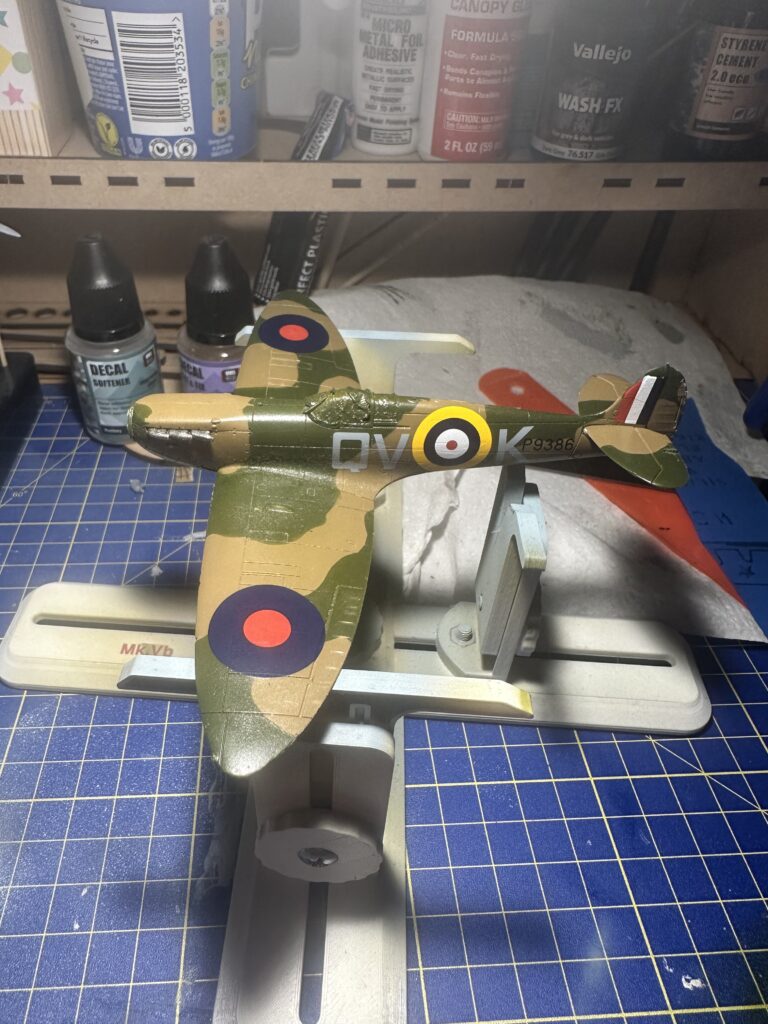
The Spitfire with decals applied.
I used Microsol to apply the decals, and I did not ruin any this time. The decals were left to dry for about a week and the the remaining partssuch as the propellor, landing gear and antenna mast, were added. The Spitfire was then finished in a Matt clear coat and then left to dry.
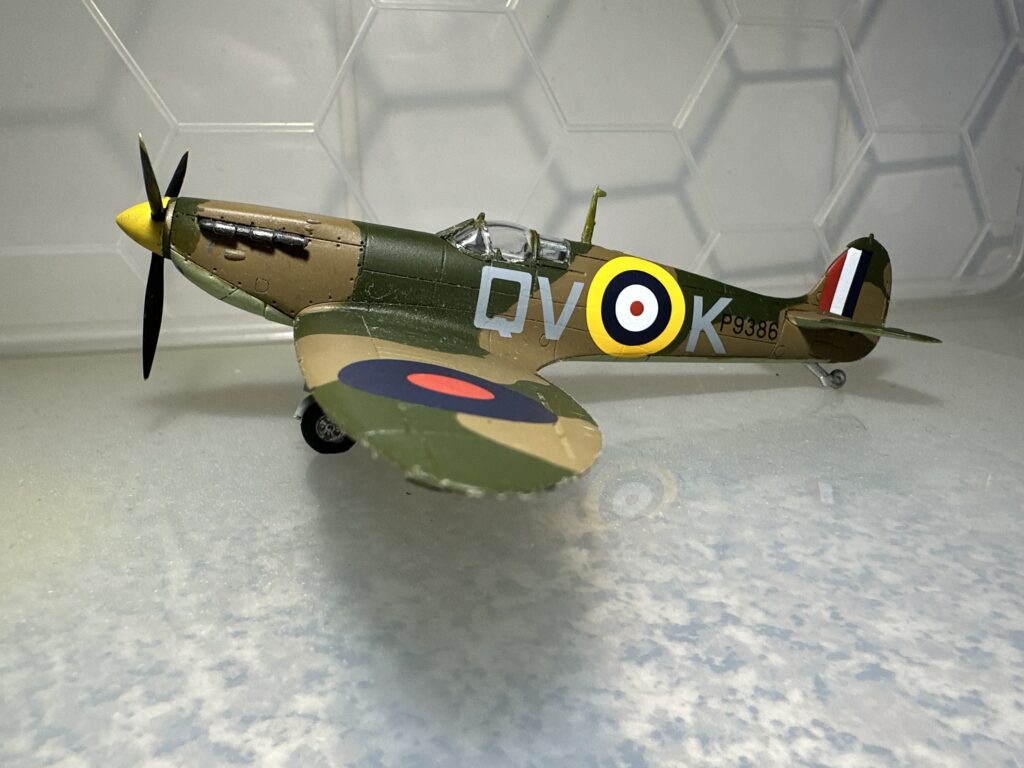
The finished Spitfire, not too bad in my opinion.
For my second model, not too bad, but I am still learning more techniques, methods and discovering materials and tools, and I hope to get much, much better.