
A Brief History.
The Vought Corsair F4U-1D is a single-seater American combat aircraft that dates back to World War two. It was designed as a carrier-based aircraft, and its fold-up gull wings make this model an interesting build for me.
I had this kit for a little while, but I didn’t have the right colour paints. I decided to order some and get started with the kit. It is another Tamiya two sprue wonder kit from the 1990’s and is kit number 61061 in 1/48 scale.
The Tamiya kit that I had featured had an option for folded wings and had three marking options. I opted for version’A’, the one that features on the box art, because I liked the scheme being all blue with a yellow cowling.
In the box are three grey plastic sprues, one sprue of clear parts, a decal sheet, assembly instructions and a technical sheet.
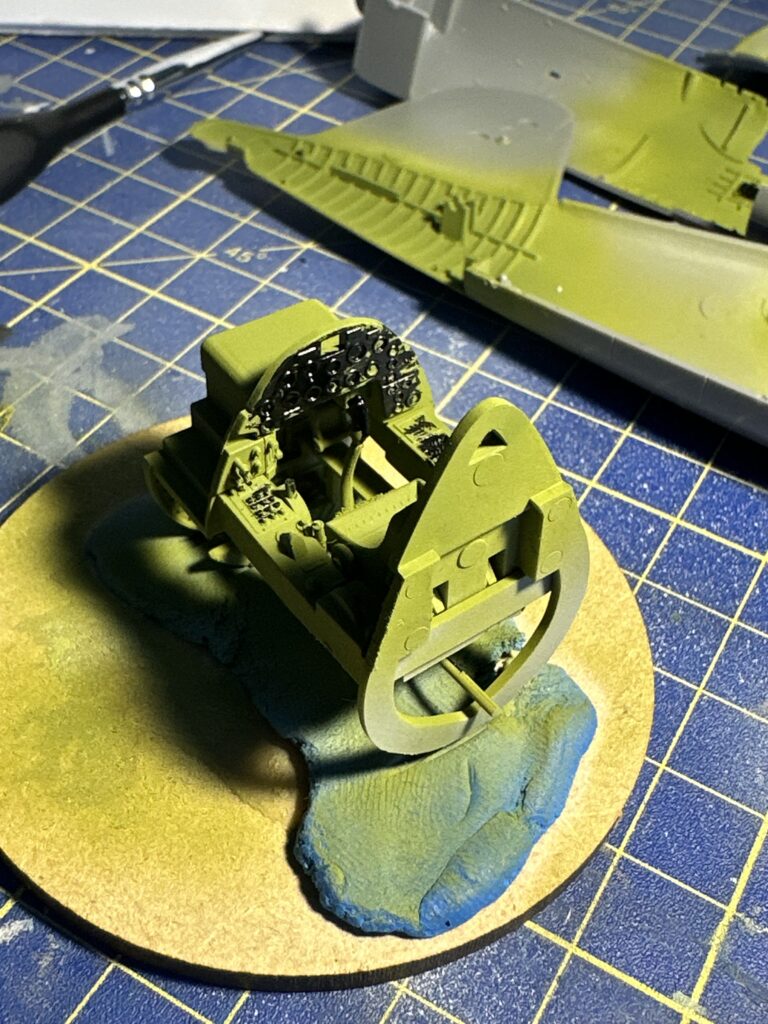
The Corsair cockpit has some intricate details.
Detailing the Cockpit.
As usual, the build started with the cockpit, and for this, I used my cement of choice, Tamiya Extra Thin. The cockpit tub is a sub-assembly and consists of eight parts, making this kit very detailed. There are some aftermarket parts available for this kit, but I just built it out of the box.
The cockpit and interior of the fuselage were painted in yellow zinc chromate that is a mix of Tamiya XF-3 and XF-5 acrylic paint. I don’t know if this is the correct colour but I was just following the kit instructions. There is a decal that needs to be placed on the control panel, as well as a decal to simulate the seatbelts.
After painting the interior, the next part was to assemble and paint the engine, again, this is another finely detailed part of this kit, and these items were painted with black primer and then finished in silver metallic, trying to simulate the real aircraft.
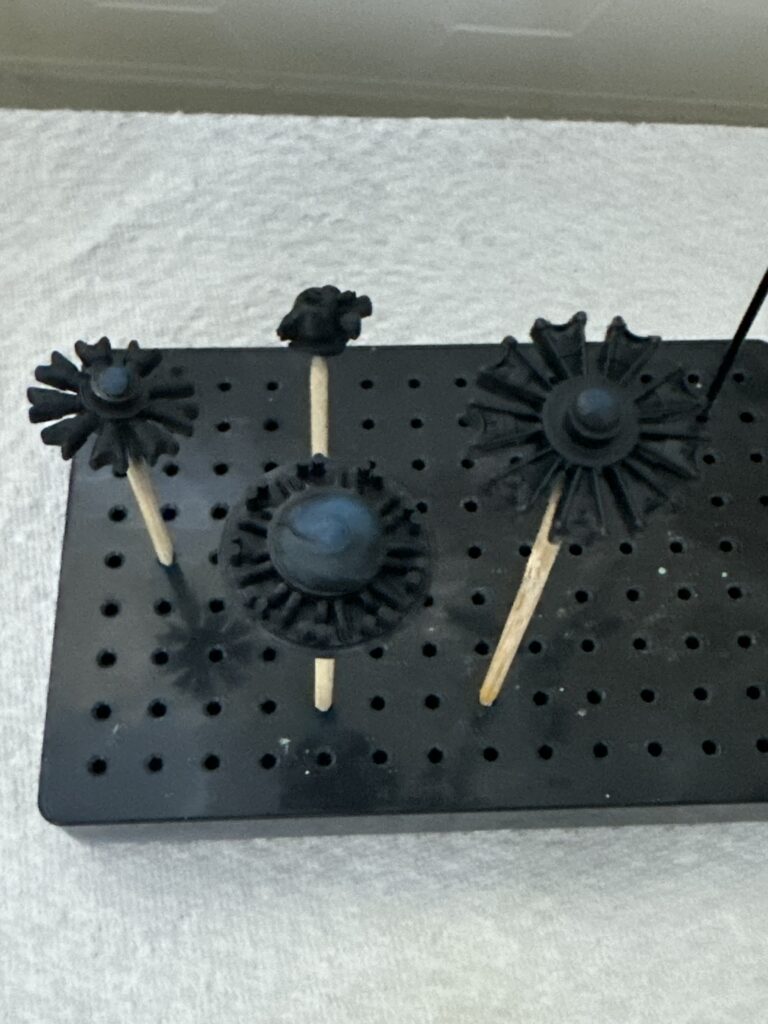
The radial engine parts were painted in black primer.
After I painted the engine, it was assembled into the cowling and attached to the fuselage. The wings were then assembled and connected to the model, getting it nearly ready for painting.
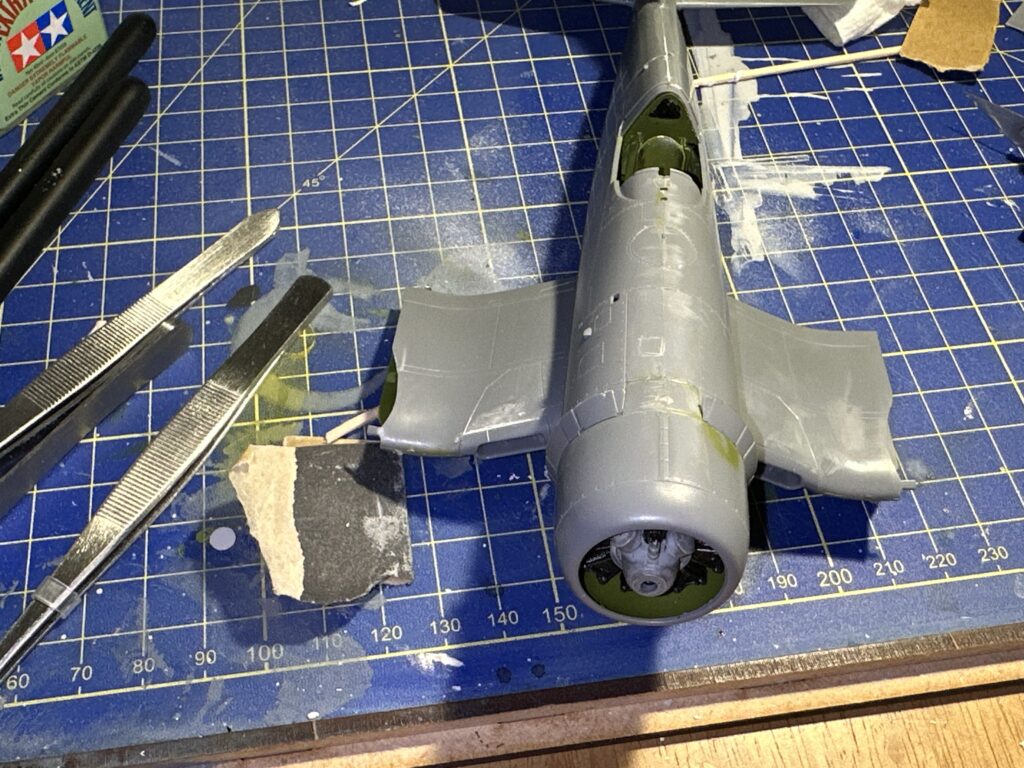
The assembled fuselage halves show the engine and cockpit detail.
Hiding the Seams.
I spent quite a bit of time filing and sanding the seams in the fuselage and achieved a great result of hiding the join seams. The last thing that you want to see in your model is the seam line of the join between the two fuselage halves. This is not present on the real aircraft, so you need to spend a bit of time and patience getting this right.

The hidden seam line of the two fuselage halves.
Masking Mistake.
I made the mistake of masking the landing gear bays with masking putty. This is not the right material to use for this, as it moves slowly if left long enough. It is difficult to remove from tight places, such as the ribs that are present in the gear bays. I think that next time I will use a sponge.
The cockpit mask, however, was a different story. I purchased the cockpit mask specifically for this kit from Kit Masx and this masked the canopy off really well, and I got a great result.
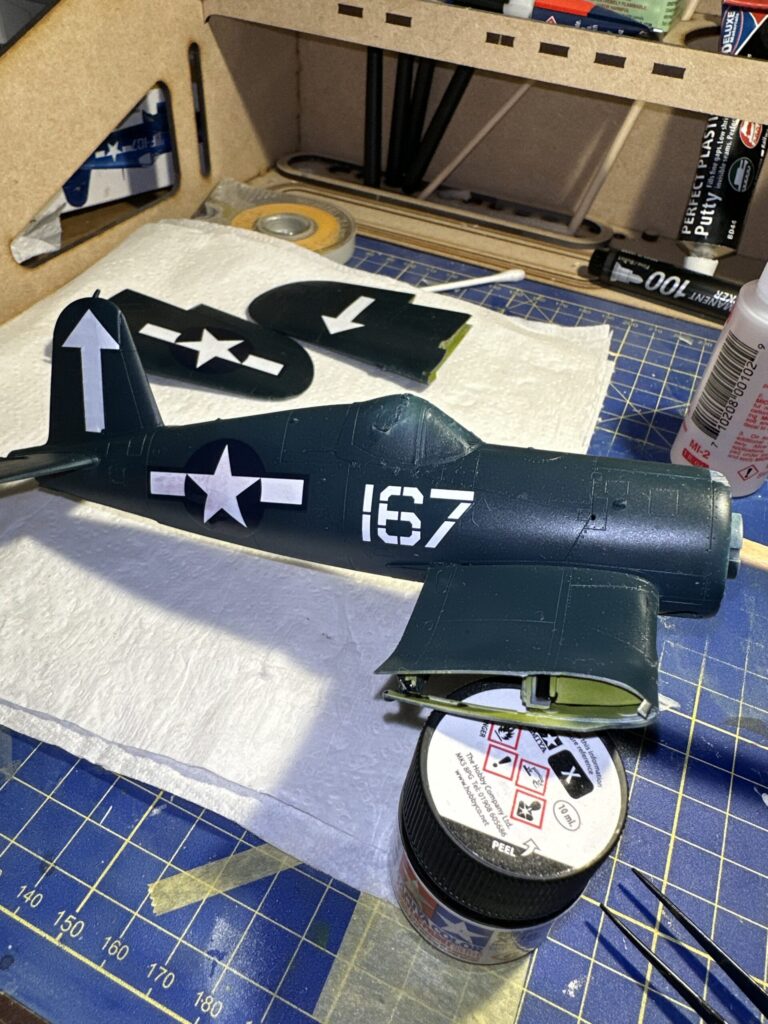
The Corsair, after painting with a canopy mask on and some decals applied.
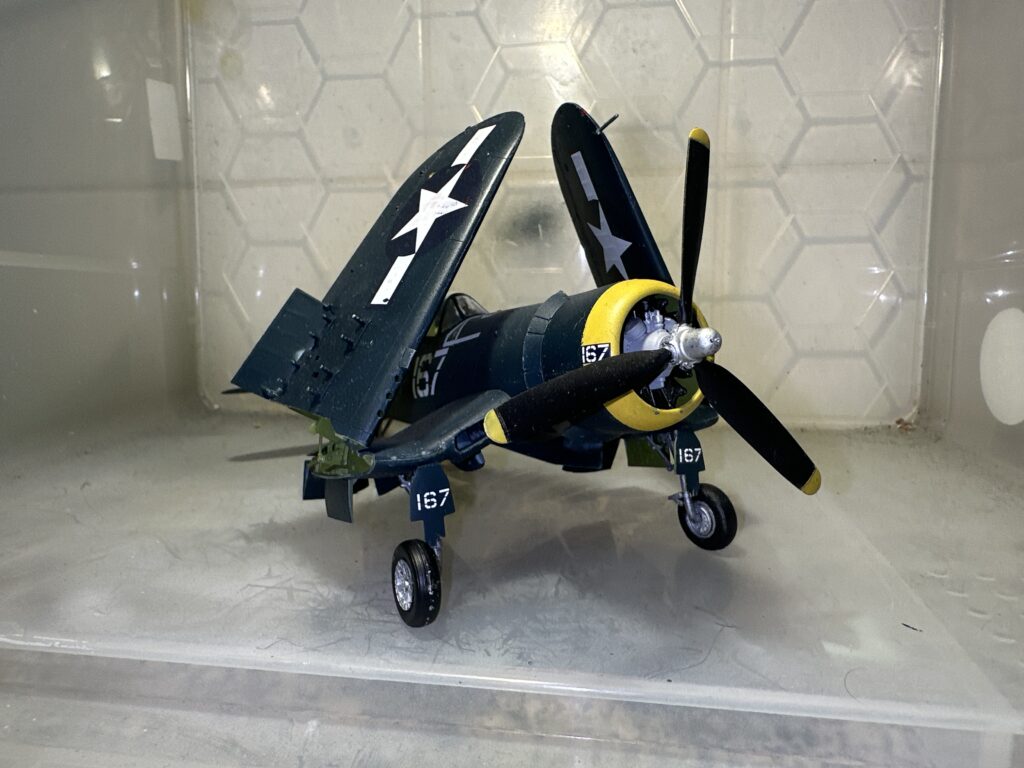
The finished kit was not bad. I am very pleased with the result. This was a great kit to build. It is very well engineered by Tamiya and went together without too many issues.
There are other versions of this fantastic aeroplane in the Tamiya range that I plan to build in the future; also, there are models made by other kit manufacturers, such as the Fleet Air Arm Corsair by Magic Factory, that I fancy building but are in short supply.
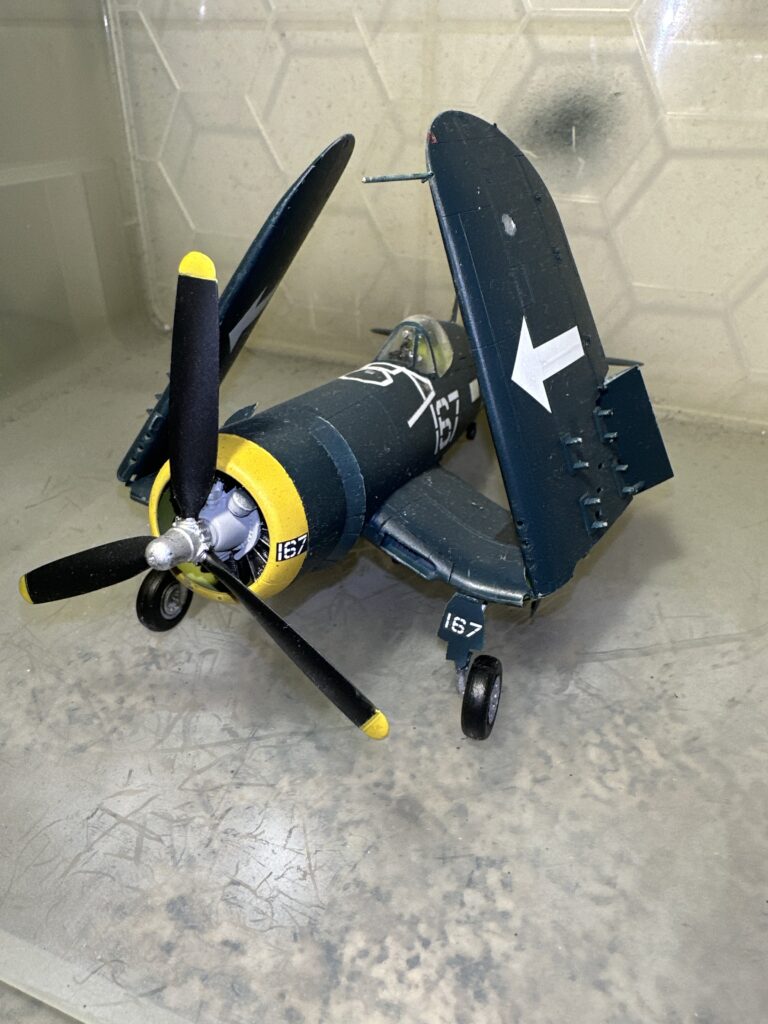
The finished Vought Corsair F4U-1D
The Vought Corsair F4U-1D makes a great kit for novice modellers wishing to improve their skills. I don’t think that this kit is suitable for a first build as it has some complex assemblies, such as the fold-up wings and landing gear.